In the year 2015, Google introduced its gRPC framework. As the name suggests, it is an implementation of RPC or Remote Procedure Call.
Before the testing starts, I have to explain a couple of significant news that the gRPC brings. The framework is built on HTTP/2 and uses a significant number of new possibilities of this protocol (more about HTTP/2 in RFC or on Google Developers). As with REST and json, gRPC and Protocol Buffers go together. Protocol buffers is a new binary format for serialization also from Google.
Every tester will certainly be pleased that gRPC is strongly type-based. Therefore, it cannot happen that the server expects a number and gets a string instead. That is why the call is faster, simpler and shorter. However, it also carries some disadvantages, such as the missing support of some tools in the present. But this is currently improving.
Description and the documentation of the API
If you have already come across the integration or testing of REST API, you already know that it all starts with getting the documentation. In the best case, you can get some Swagger from the API developer, in the worst cases a PDF or nothing.
A big advantage of gRPC is that getting a swagger export is not not at all necessary. You can just find some proto files and you have everything that you need. These files describe the interface of different messages including their types..
How to do gRPC testing?
There are many tools for gRPC testing - such as Kreya, Insomnia, Wombat or BloomRPC. In Ackee, we use gRPC in two big projects (FlashSport and FlashNews) and we use BloomRPC for calls and decoding. I will describe below how to set up and run the tool.
At the same time, we have performance tests set up on gRPC and we use the following tools for them: k6 and ghz. Both are open source and we use them for different purposes. K6 is more complex and used for custom tests. Ghz is for the simpler tests. But we will get more into that next time.
BloomRPC
Let’s run gRPC in Node using BloomRPC locally. In order to make it work locally, you will need to have Node installed already.
When you start running your own project in BloomRPC, make sure to watch out for automated filling out of strings which needs to be corrected before running it.
- Install the BloomPRC.
- Clone the repository
$ git clone -b v1.35.0 - In the folder dynamic_codegen, install the npm using
$ npm install - Run the server
$ node greeter_server.js - In another terminal window, run the client
$ node greeter_client.jsThe response should be Greeting: Hello World
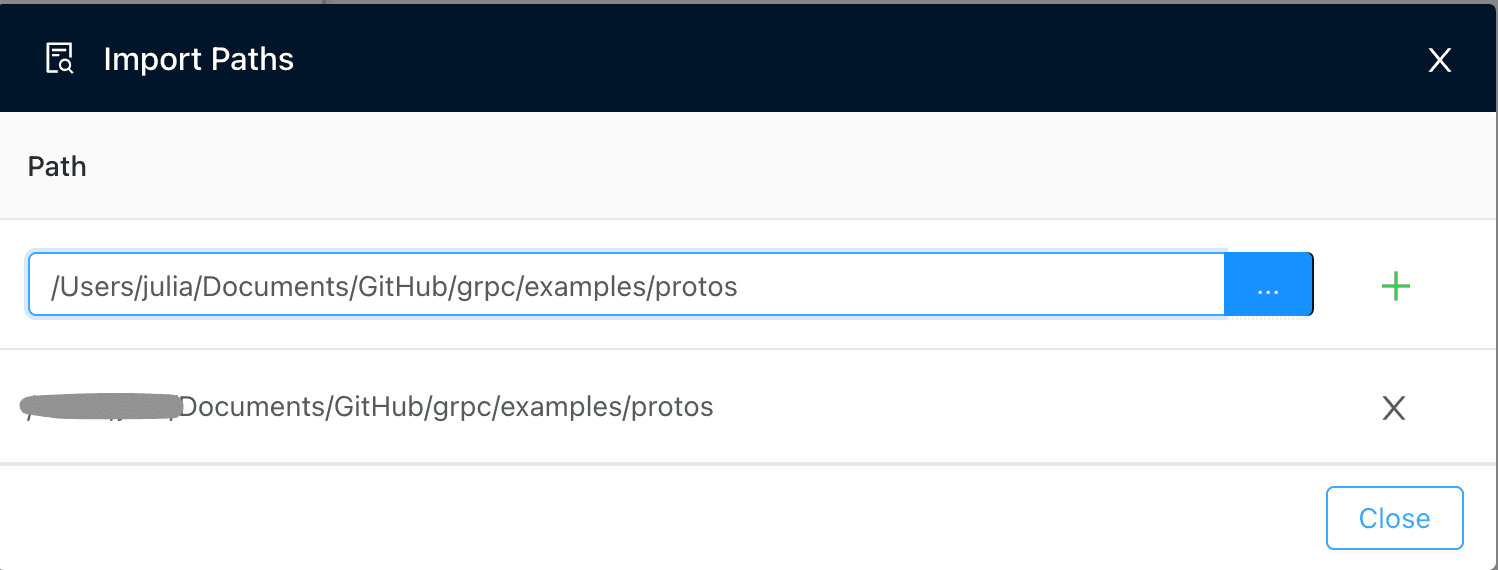
- Open the BloomRPC and set up Import Path based on where you cloned the repository.

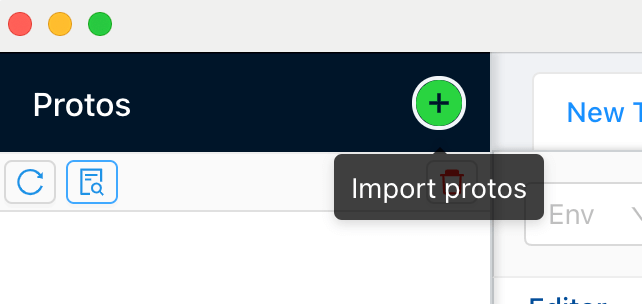
- Now click on the Import protos and directly in the folder protos, select all proto documents. That is how BloomRPC finds out about the communication interface.
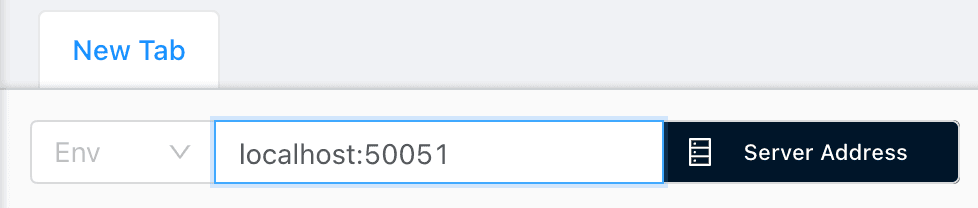
- Set up the URL to localhost:50051. That is where the grpc server will run.
- Now we can run our server Greeter. Select SayHello file and run it using the play icon.
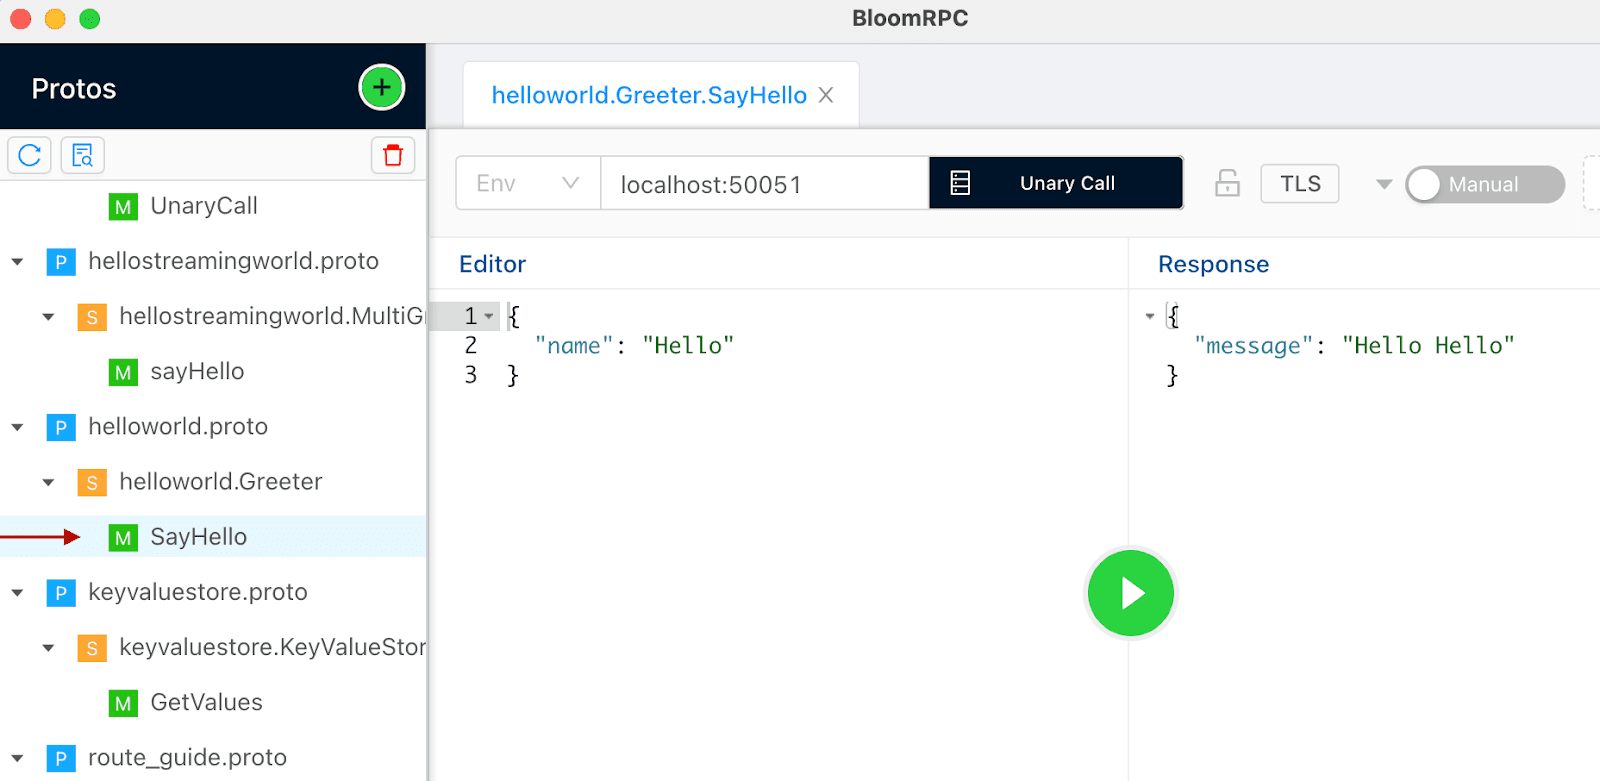
- Done :)
Conclusion
In gRCP I was moving from REST which I tested using Postman. Looking back, I have to admit that Postman seemed much easier. At the same time, it has functionalities that BloomRPC or other tools do not have such as scripting, automated testing, mocking data etc. We will have to keep waiting for these functionalities.
Sources: